Bright & Cozy Master bedroom complete

20180109_151959.jpg

So, when you start a renovation list on a home, there are certain priorities. For me top priority is calculated by asking myself:

1. how much time will I be spending in that room?

2. how ugly is that room?

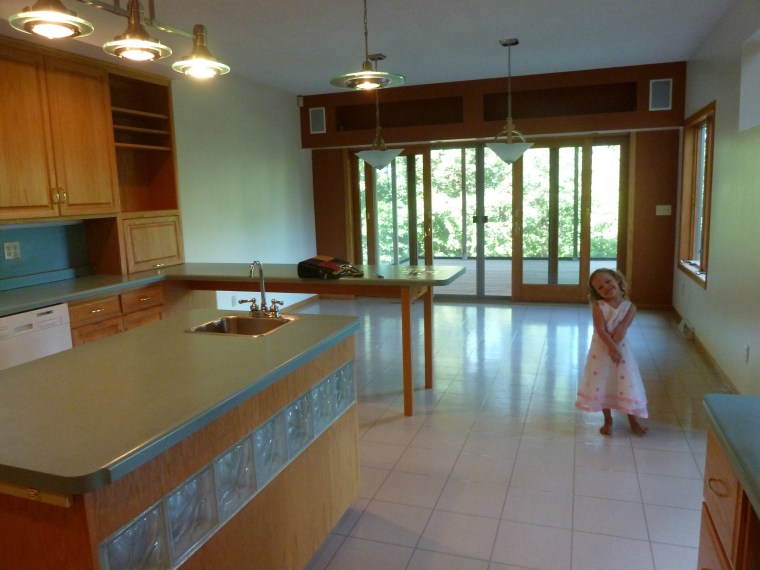
My bedroom was so very close to the top of the list Because when I first walked into our now Master bedroom it sorta made me want to cry…it was that UGLY.

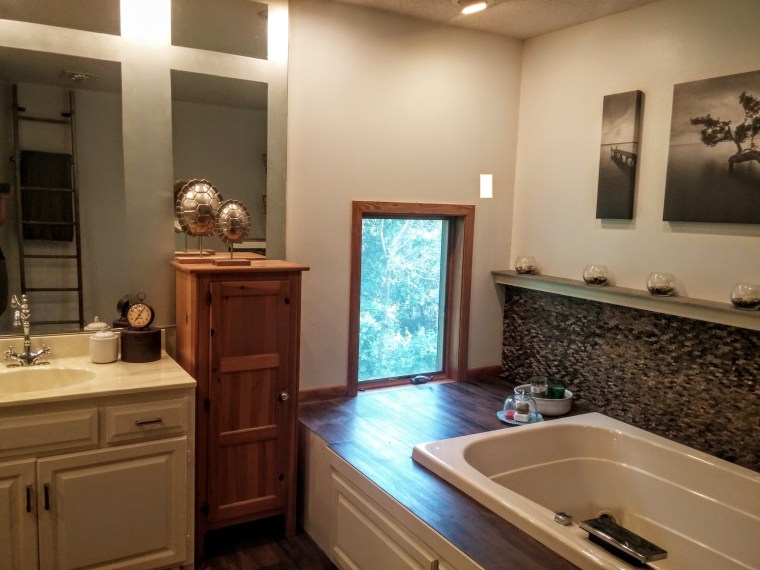
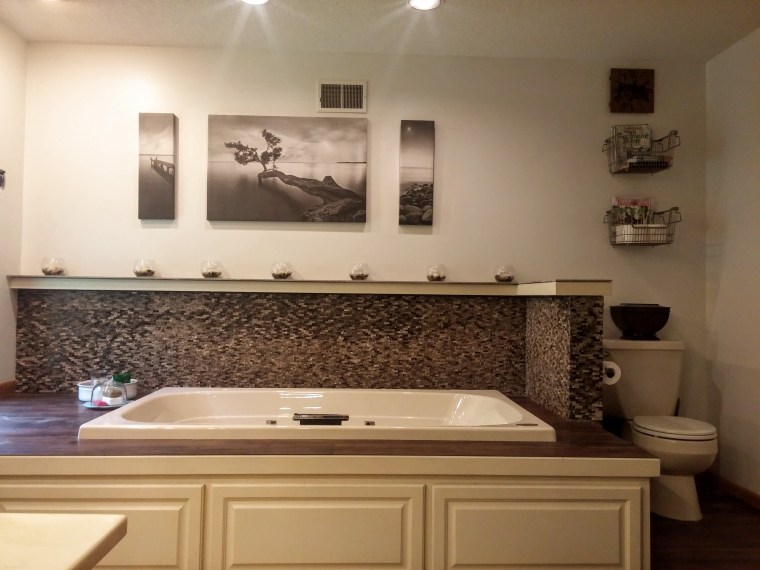
Dated wallpaper, orange colored wood walls, saloon doors on the closet, dust caked lace window coverings, sparkling (really, with sparkles) popcorn ceilings,  random mirrors hung in several places, it had a lot of hideous things to look at….

master2                                                            See what I mean!?!?


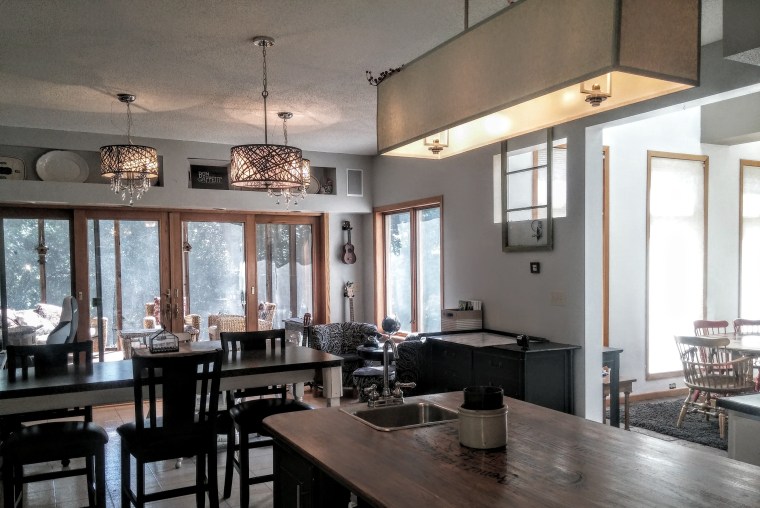
Wallpaper is GONE, Wall sconce is GONE, Dusty lace curtains are GONE, odd shaped random mirrors are GONE! Yay!

LOTS and LOTS of my favorite Behr paint were used to turn that tired, dated bedroom ………….into……………

THIS20180109_130318

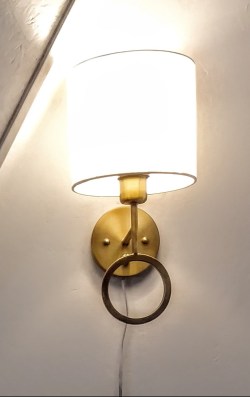
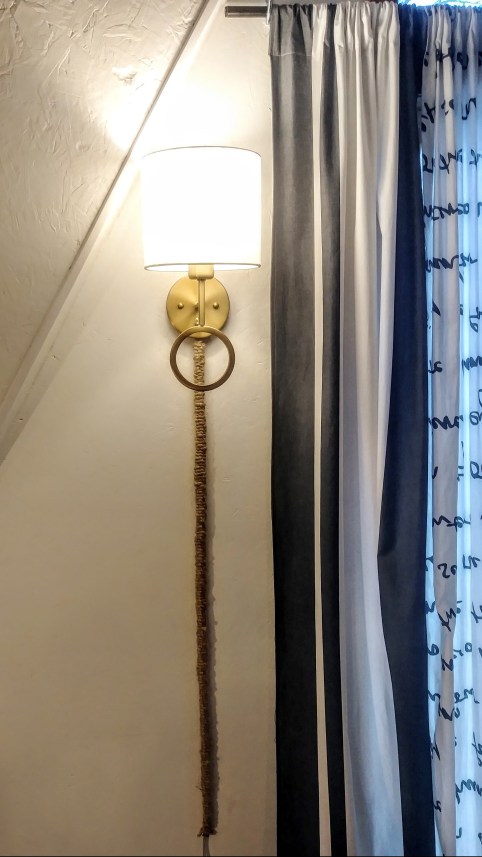
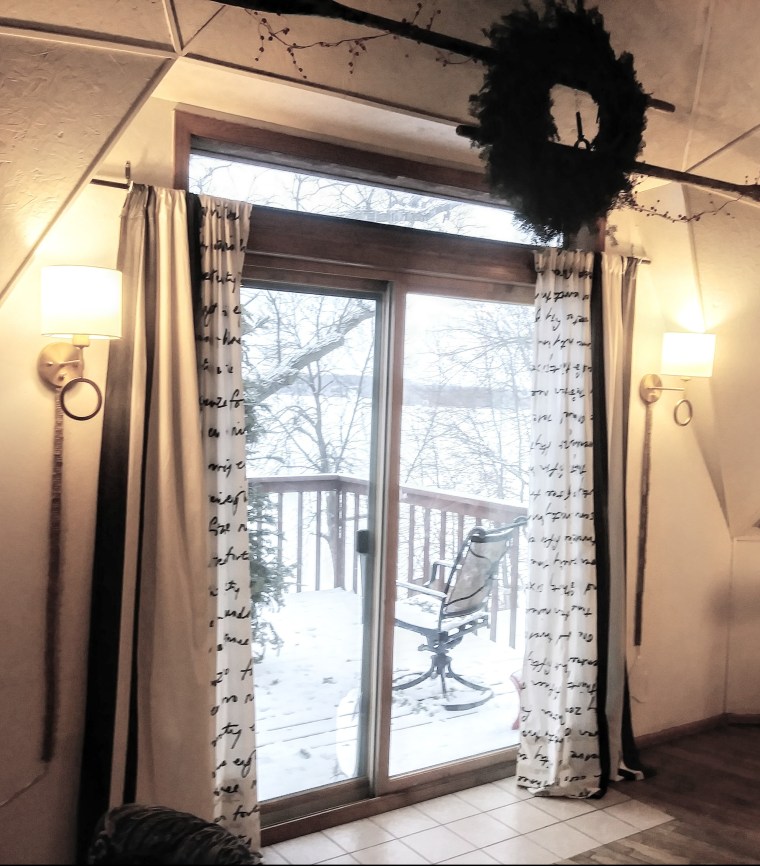
I replaced the old wall sconce with this industrial beauty I found on amazon.com, I’m really drawn to a hint of brass lately, and I am glad I settled on this fixture.

20180109_130059

I used a PURE white on the wood accent half-wall, and went DARK for the upper half of my retreat.

I love how the contrast makes the room feel bright, as well as cozy!

20180108_184155

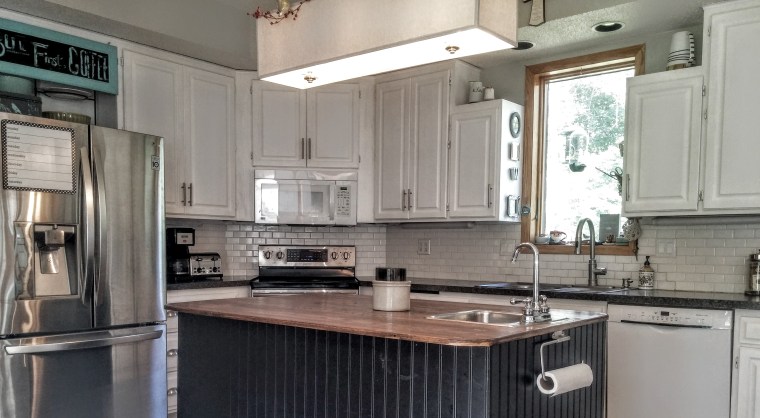
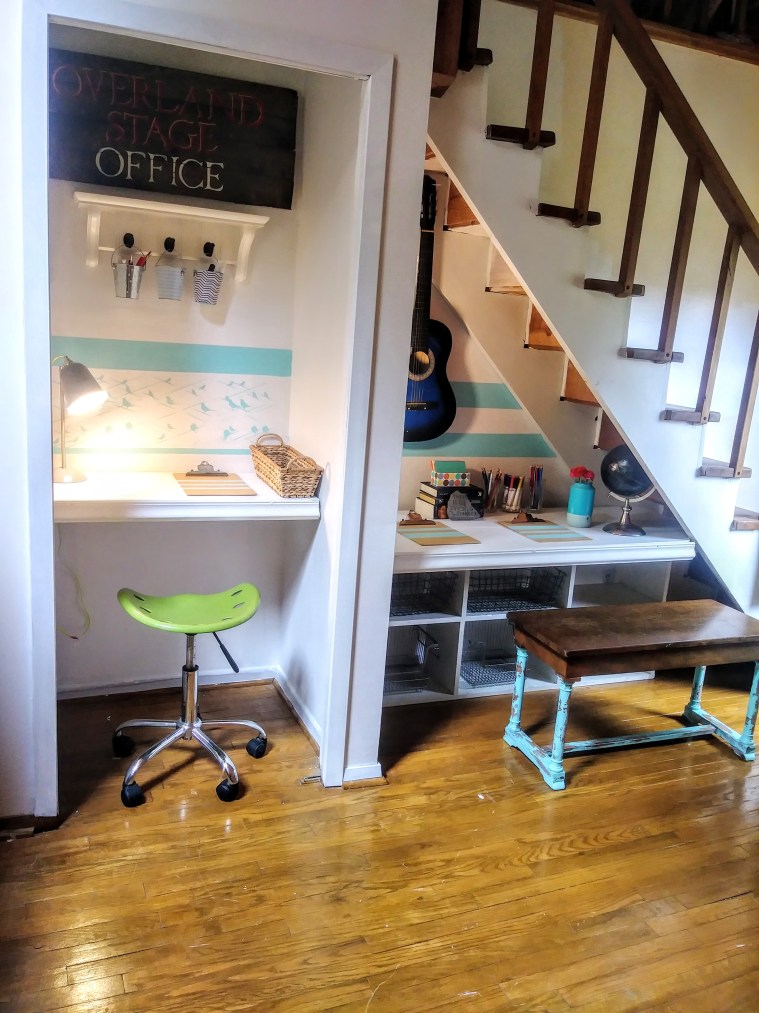
I even have room for a little “crochet corner”

20180108_183914

What a difference PAINT makes!!!

20180108_184147-COLLAGE

I LOVE my new bedroom!!

NOW………

Onto the next project!!!

Pretty Sconces, UGLY electrical cords

Our home is always changing, and one of the most positive changes in the last week is WALL SCONCES!! YAY!! More light!!


20171229_121945

I ordered a pair of sconces on Amazon, and put them up on either side of our sliding glass doors. I was in LOVE with the design  & extra light, but underwhelmed by the electrical cord dangling awkwardly under it…..so I got this crazy idea….


20171229_122136


I wrapped those ugly cords in jute twine!! Yep!


Sconce BEFORE (see what I mean….)

20171229_122055


Sconce AFTER!!!

20171230_102444


20171229_160448

Both Sconces took me about 2 hours, I just tied a simple knot, and repeated…It was really not too time consuming, and I am really happy with the result!!, now

GO TRY IT!


20171229_160533.jpg


Fixing the ENTRYWAY

The ENTRYWAY…

What can I say? It was dark, and ugly with really old wallpaper that was just begging to be ripped from the walls. It was not inviting.

It took a LOT of time, steam, putty knives, several coats of paint, many band-aids,  and my trusty multi-function ladder.

Now when you walk into our home, it feels light, happy & welcoming!!

20171206_141554.jpg

The Entry BEFORE

Wood paneling, hideous wallpaper, bi-fold doors….Why?!?

Hey, WALLPAPER!!! you are THE WORST decision to un-do!!!

0526171914

The Entry AFTER!

20171206_141508

20171206_104212

20171206_141659

20171206_103905.jpg

Henry the bear head agrees, this updated entry is a MUCH happier space to “hang out in”

20171205_172635

Hehehehehehe (wink)


Creating an office in a SMALL space

I’m prone to daydreaming,

 & I’ve always loved the possibilities of spaces under stairs….I’ve spent hours pondering. Should I turn it into a reading nook? Or have dozens of odd shaped drawers crafted that would store oodles of the “things” that have collected on the kitchen table, and in bins everywhere? Or…perhaps a small tucked away office that is quiet & tidy??

After many hours of decluttering, cleaning, and a serious heart to heart with pinterest, I decided on an office…..it just seemed right for our space.


20170817_134947


The Girls totally loved the idea, and soon it was the Girls’ office project

(funny how that happens around here)

I obliged hoping that it would make home-work a tiny bit more appealing


This space was seriously a junk spot for all the stuff I didn’t want people to see when they came over. It was dark, and dusty, and a spot I didn’t try to visit.

The staircase BEFORE

20170815_090024 (1)


Painting the walls, and sides of the steps took about 3 coats of paint, It was a lot of edging….so it took some time, and lots of coffee!!


The Girls decided on teal as their accent color of choice….so we measured & taped off two stripes ( I LOVE stripes) & added some stenciled details


I used some old bi-fold doors for the “desk-top”, and added trim to the desk fronts for a more finished look, painted some accessories to match, and…..


20170817_13322220170817_13500920170817_133044

Now, the space is not PERFECT, but it is cute & so useful!!

Well, ready for the NEXT project…..


A LITTLE PREVIEW??


It’s just a TINY bathroom, how much time could it take?

I don’t know how I completely trick myself everytime, but I always think a task, an errand, a total bathroom renovation,  is going to take WAY less time than it actually does….This time was NO different.

The bathroom BEFORE:

It was intended to be a new toilet, new paint, new vanity sort of situation….I would do the penny floor I have wanted to do, but after this summer, and once things slow down. Once the toilet came up, it was obvious the entire floor needed to be replaced, and it needed to happen NOW!


 So, we moved that penny floor to the top of the list… and got to work collecting and laying a bathroom floor with cold…hard….cash.

The truth is, it looks complicated, but you really cannot mess this floor up…one bit of advice? Start on one wall…it will be tempting to line the entire permiter with pennies…but DO not do this….

just stick to the ONE SIDE and work you way out one row at a time

I glued down the pennies with Liquid nails, grouted it, then used a clear gloss coat pour on epoxy to seal it. Wha-LA!

0531171203b05311712040531171204a0531171204b

Lighting UPGRADE

WE BOUGHT A GEODESIC HOUSE!! Like, a totally ’70’s DOME HOME, people!

It is a work in progress, and I have to say, I am really excited about what fantastic BEFORE and AFTER pics I will have to share in the coming months….and years..


It is really BROWN….everything outside is BROWN, all the sheds, all the decks, the roof, the garage….and I have to admit, I am not a fan of BROWN, so that will be changing….

It’s on the list

It’s a very long list

The first thing I DECLARED would change upon moving into this very brown house was the light fixture in the dining area…

I Imagined I would rip it out, and smash it to bits in a fit of joy & renovation, but then I had a THOUGHT…….

“WHAT if this is the first thing I SAVE?”

~This thing~


So I decided I would save it’s life, and make it into something much more

BEAUTIFUL, which is kinda my thing

I went to Target, and Marshall’s in search of a Giant basket, or outdoor lawn ornament, or Hurricane lamp that could act as a large shade to go over the ugliest part of this fixture, and Marshall’s won with a GIANT basket that was just about right

I brought it home, ripped off the bottom, and found my jute twine, and got to WORK making the chain & wiring look more modern/nautical

0421171426

0421171425

Notice those amazing PARTICAL BOARD Tri-angles? I know, right!? I told you, this dome home is a WORK-IN-PROGRESS!!

I promise I will update you with those before & After’s too!!


Creating an upscale BAKESALE

I was asked to take over the bake sale at a benefit my sisters & I hosted recently….and I knew I wanted to make it SUPER colorful, happy, and UPSCALE, but I had NOTHING colorful, or bakesale-y ……. so I headed to the THRIFT store!

I  bought  99 cent goblets, plates & vases. I also found some trays and platters…brought them home, and SPRAYPAINTED (almost) EVERYTHING!!

I glued the vases, and plates together (in random order) to create some very inexpensive cake stands!

0519171228


0519171228b


0519171229


I looked throught the house for things that could be re-purposed, and found some fabric in a bin I had been holding onto for YEARS….a cute birdcage we could use as a donations bin, and painted up some signs, crates, and a small shelf…


0524170921


0524170923

Added PRETTY baked-goods, and a few flowers

…..(and some awesome kid helpers)….

0520171517d.jpg


0520171652b.jpg

0520171517 (1)

There is something very rewarding about handing out sugary delicious treats!

clone tag: -8977446522972752926

I sense more bake sales in my near future……

Art EVERY day

I saw this shirt, and I love it, and it is a child sized shirt, yet somehow I still needed it. So I bought this child sized shirt, and brought it home, and thought about how I was going to make this into something I could see everyday. So, I came up with an idea….I stretched it like a little canvas, and it was so easy!


I made a frame with 2×2’s  I found in the garage, super simple,


0909161435b.jpg

Then, I placed the shirt on the frame to make sure the design on the front was centered, and in the perfect spot


0909161436a

This one was a bit tricky, because this shirt was a tad smaller than the frame I made, so I improvised

0909161438

I stretched that shirt as far as it would go, and stapled it 3 times on top, and 3 times on the bottom

I stapled it to the inside of the frame, so that there are not too many staples showing from the outside, then pulled the edges tight & stapled, then cut off excess fabric

0909161443

TA-DA! There you have it!

0909161444.jpg

Now I get to look at it everyday! Yay! Everything does grow with LOVE! Now, go make one!

I dreamed the kitchen was clean…..

To be bluntly honest the kitchen in this house we bought was ugly! It was outdated, dark, and in my opinion, the reason the house sat on the market as long as it did.  The only thing we haven’t finished yet is the flooring…..

….but I’m too excited that the kitchen is clean that I am going to post some pics, because I am just excited enough to not be embarrassed about it

THE KITCHEN: BEFORE

P1190205

P1190201

Glass block on the island….and my sweet little Ellie

THE KITCHEN: AFTER

0806161122a0806161123a0806161123d08061611420806161143a0806161143b

So, that is the kitchen!! So looking forward to some new flooring!!!

The master RETREAT is complete

The master bedroom, and bathroom are my very favorite places on the earth right now….it  has been a process, but I am so happy with the “after” on this update!


THE MASTER BATHROOM BEFORE

Formica, and shiny vinyl flooring made the space feel dated, and really, really GREEN


P1190199P1190200


THE  MASTER BATHROOM AFTER

Many, many hours later, the master bathroom feels much more bright, and light, and RELAXING!

0801161006a

0801161005

0801161004a0801161018new one

0801161003

The Master BEDROOM got an updated look too!! Sorry, no BEFORE pic of this one

0722161352a0722161352b

Walking into a clean, finished space is like a breath of fresh AIR!!